Tuesday, June 28, 2016

YANA SMAKULA: Foiled Accents with Heat Embossing

Hello everyone! This is Yana Smakula with a fun technique to bring your color layering images to a whole new level.

I love multi layer stamps, for someone who is not very good at coloring (like me), these are perfect for creating beautiful dimensional images. I always look for ways to stretch my color layering stamp sets and inks needed to stamp the images and in my previous video I shared a technique where one can use white pigment ink to stretch the color of one ink pad. Today I'm going to continue this topic but I will do something different - I will replace the top layer of color layering images with first heat embossing and later foiling.

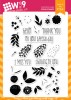
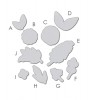
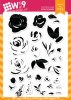
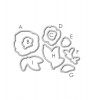
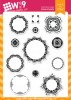
The stamp set I am using today is one of the older sets from WPlus9 - Fresh Cut Florals. The reason I chose this set is because the third layer of most of the images in this set is represented by a single dot or several dots and these are ideal for foiling with heat embossing.

Before you jump in I should probably say that this technique is rather time consuming. You’ll need about an hour (or more if you are making die cuts for several cards) to create your card, however I do believe the result is worth every minute you spend in your craft room (and who doesn’t like some extra play with with our supplies?).

I filmed a detailed video tutorial where I walk you through the entire process and explain what you can and what you can’t (or shouldn’t) foil with the help of embossing powder and more.

Watch above or watch in HD at YouTube

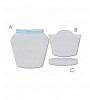
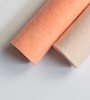
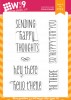
To finish the cards I’m sharing today I also used a beautiful Preserves Jar Die , Hand Lettered Hello Die and stamp set as well as Shades of Peach Wool Felt. I am very happy with the quality of this felt and I was able to easily die cut even the most detailed and intricate die.

For my color combo I went with white, Last Leaf, Miami Spice and Sweet Nectar, and Hayride and Wild Mango. (You can find links to all of the supplies below) A touch of gold and silver foil really made my simple cards pops.

I created three projects in total and I went with different sentiments for each.

While foiling with the help of heat embossing is not something that will work every time (especially not something you want to use for sentiments), I do love the final look I was able to achieve on these card.

Have fun stamping! - Yana Smakula

Featured Supplies

For your convenience, here is a list of the supplies (or equivalents) used on today's project(s), along with links to purchase. Please note: this list does contain some affiliate links.

Monday, June 27, 2016

GUEST ARTIST FEATURE: Kay Miller

Hello Friends! Kay Miller from My Joyful Moments here today, and I am super excited to be here on the Wplus9 blog! I have been a huge fan of Dawn's for several years, ever since I discovered Wplus9.

I have a card to share with you today using some gorgeous products that I just love! I don't think I'm the only one who fell head over heels in love with the Free Hand Florals stamp set. I am also using an older set, Lacey Layers, which I've had in my stash for a long time that I dearly love! It's so great for layering and building collage type cards.

So for my card, I started by watercoloring the background using a light tan dye ink on watercolor paper. When this was dry, I splattered some more of that same color ink around. I let this dry well. I then stamped two of the medallions from the Lacey Layers set with that same tan dye ink that I used for the watercoloring. I adhered these to my watercolored panel with foam tape.

I then stamped the roses in three different shades of pink and the leaves in two shades of green. I cut those out with the companion dies. After arranging them just perfectly, I adhered them with foam tape.

The sentiment is from the Strictly Sentiments 2 stamp set. I stamped it in the same tan dye ink that I used on the medallions, and cut it out with a banner die. I adhered this just under my cluster of roses with foam tape. I felt like my card still needed something under the banner for balance, so I added one more bunch of the green leaves just underneath.

I adhered this whole panel to an A2 size top folded white card base and added a few clear sequins.

I hope you have enjoyed my post today and are inspired to create something beautiful! Thank you so much for stopping by, and a huge thanks to Wplus9 for having me for a guest!

Featured Supplies

How amazingly talented is Kay! I want to extend a heartfelt thank you to Kay for showcasing Wplus9 in such an amazing way. I have been a fan of Kay's work for quite some time, so it was extremely humbling to have her as a guest. It has definitely been our pleasure, thank you so much Kay!

For your convenience, here is a list of the Wplus9 supplies that Kay used on her project today, along with links to purchase.

Sunday, June 26, 2016

Love and Hugs for A Speedy Recovery

Hello! It's Kara, and today I'm sharing a card featuring the adorable Get Well Gang stamps and dies as well as many other products from this month's release.

I started my little scene by creating a sky with some Peacock Feathers distress ink. On top of that, I layered the landscape using the Tree Border Die and the Fence Border Die. To dress up my fence I stamped, die cut, and copic colored some grass and a potted plant from the Garden Buddies set.

I then added this poor kitty with a broken leg as well as his medicine from the Get Well Gang set. Both were also colored with copic markers. To finish it off, I added a sentiment from the same set. And just for fun, I have him day dreaming about fish! :) I stamped the little fish in a thought/speech bubble that I die cut from the Friends For All Seasons: Summer Die set.

Thanks so much for stopping by today! Be sure to come back tomorrow for a special Guest Artist!


Featured Supplies

For your convenience, here is a list of the supplies (or equivalents) used on today's project(s), along with links to purchase. Please note: this list does contain some affiliate links.


Connect with us:

Follow Us on Pinterest